


Elf Mommy
Well-Known Member
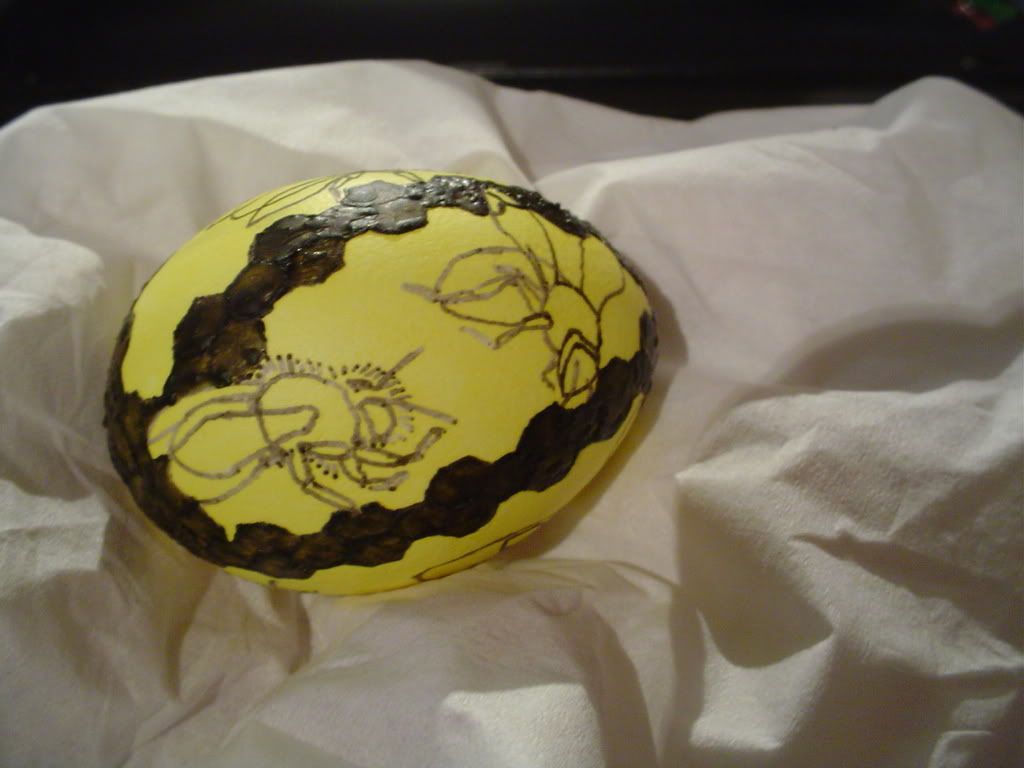
Here's a sneak peak at what I will be creating for the next auction:
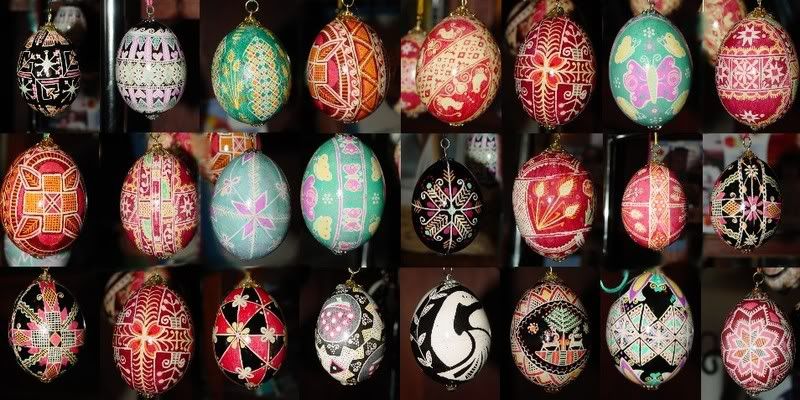
What is it, you ask? It's a batik egg, a Pysanki Egg. The ones above are a sampling of some eggs I made for my coworkers one year. I will be designing an ORIGINAL RO Ukranian Egg for the next auction. I plan on posting the progress of the artwork here in this thread! If you have MSN Messenger, I will be trying to set up a camera so you can even watch me while I work!!! I created the email [email protected] so I can do this! Add me to your list!
How are they made? Well, here's a basic run down:

I hope you will enjoy the process of my egg-creating with me and I can't wait to see how it turns out! My sister may even donate a duck egg so I can create 2 for the auction (one duck egg, one chicken egg!).
What is it, you ask? It's a batik egg, a Pysanki Egg. The ones above are a sampling of some eggs I made for my coworkers one year. I will be designing an ORIGINAL RO Ukranian Egg for the next auction. I plan on posting the progress of the artwork here in this thread! If you have MSN Messenger, I will be trying to set up a camera so you can even watch me while I work!!! I created the email [email protected] so I can do this! Add me to your list!
How are they made? Well, here's a basic run down:
- Take a chicken egg and wash it off with vinegar. From then on, you need to either wear gloves (which I hate) or hold the egg with tissue--no more touching which adds human oils to the eggshell and will ruin the design.
- Poke a small hole in the egg in the top and bottom.
- Use a long pin or needle to break up the yolk inside the egg.
- Using an ear bulb that you would use on an infant, gently blow the insides of the egg out into a bowl. This is a bit difficult and if you blow too hard, the egg will crack, which can ruin the design. You can use the inside egg part and make omelets or anything else that uses egg, but usually after blowing it out, you've lost your appetite for using it. LOL
- Gently rinse out the inside of the egg with tap water.
- If you feel it's needed, wipe down the egg with vinegar again.
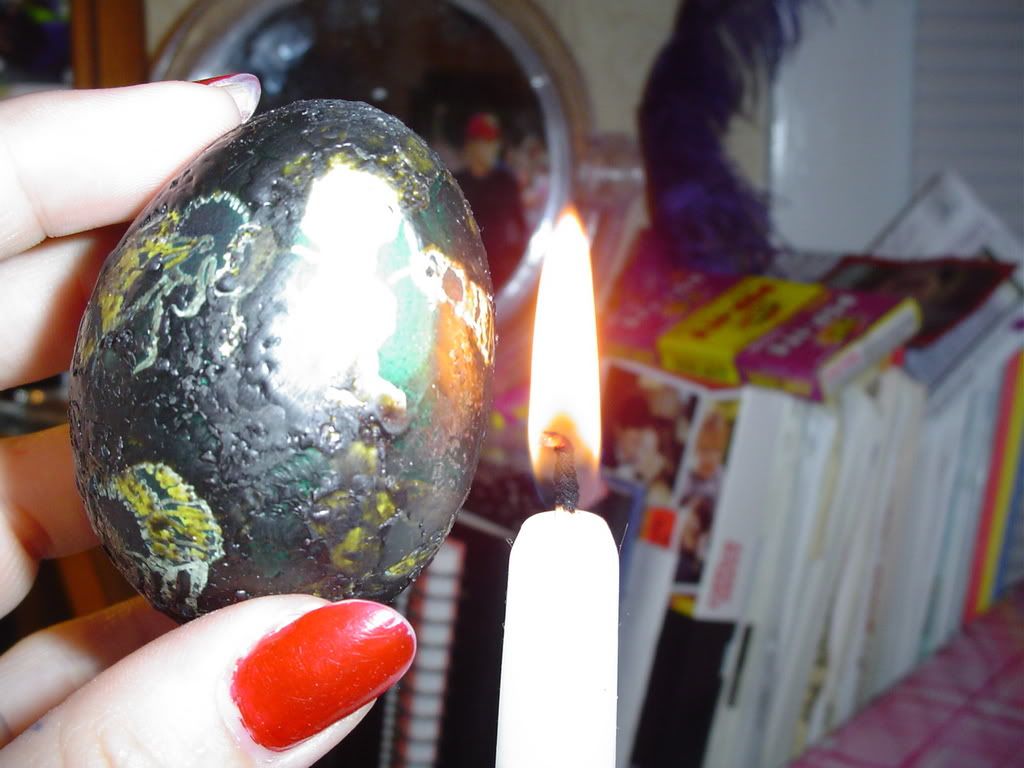
- Heat the kistka (stylus) in the flame of a candle.
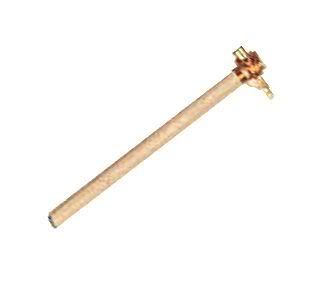
- When the metal part of the kistka is thoroughly heated, let it sink into a pat of beeswax.
-
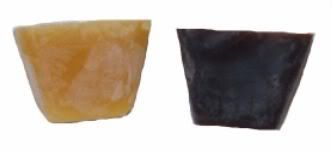
- The kistka will fill with the wax as though it were ink (even the gold one turns black when it has been heated). Use the wax to seal the top and bottom of the egg so no dye goes inside.
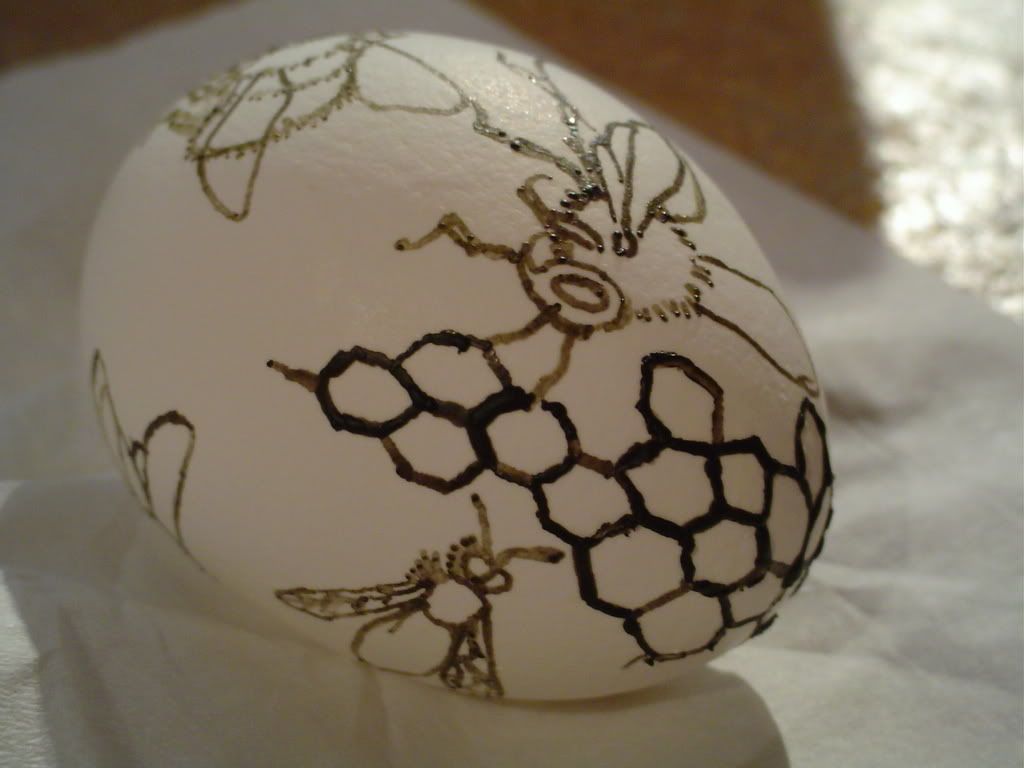
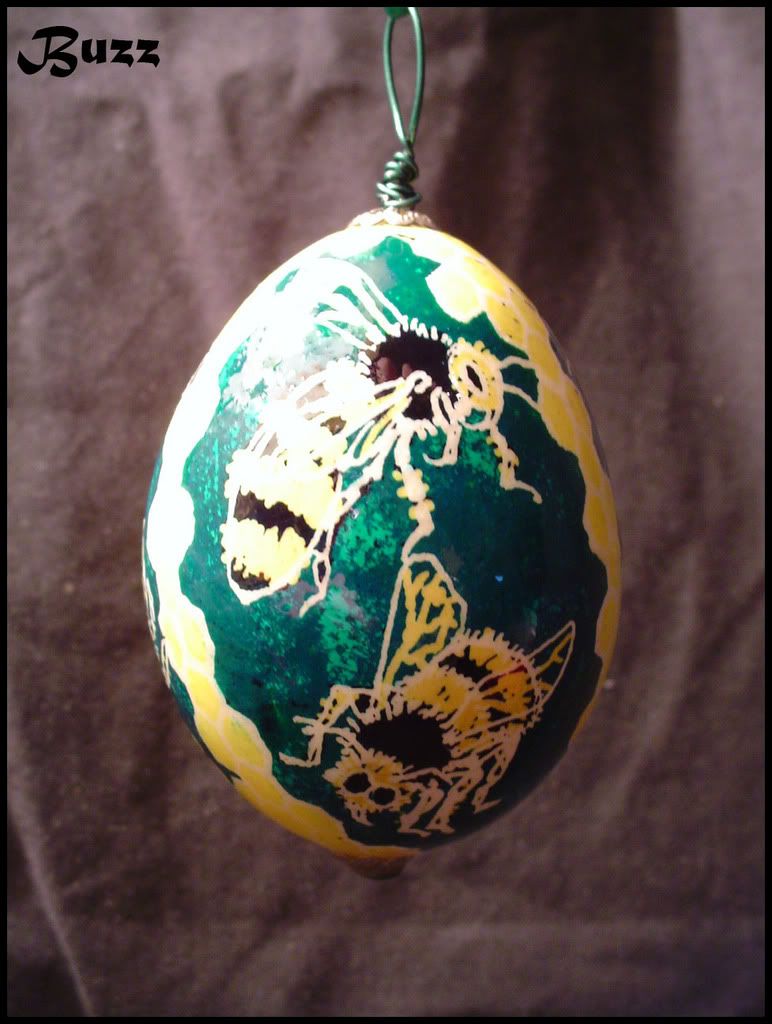
- Then it's time to create the design. Most eggs are done with geometric designs and all symbols mean something on the eggs. For instance, wheat means prosperity for the next year, stars represent life, dots represent stars--points of light with no beginning or end, OR they can represent eggs--the beginning of life, etc.
- Sometimes I'll create some guidelines with pencil if the design is really intricate, but usually I'll just start drawing.
- You have to work from the lightest color to the darkest. Anything that is white on the egg, you cover with wax first.
-
- Then you dip into the next lightest color, say...yellow. Hold the egg under the dye (I use a wire egg holder similar to the ones you get with Easter egg kits, but longer and secure the egg under the dye with a clothespin holding the wire to the side of the jar).
- Once it's the color you desire, use the wax to cover up whatever you'd like to remain yellow. Heating and dipping the kistka in the flame and the wax repeatedly (also difficult, because if the wax is TOO hot, it will run out and create a big blob on the egg)
-
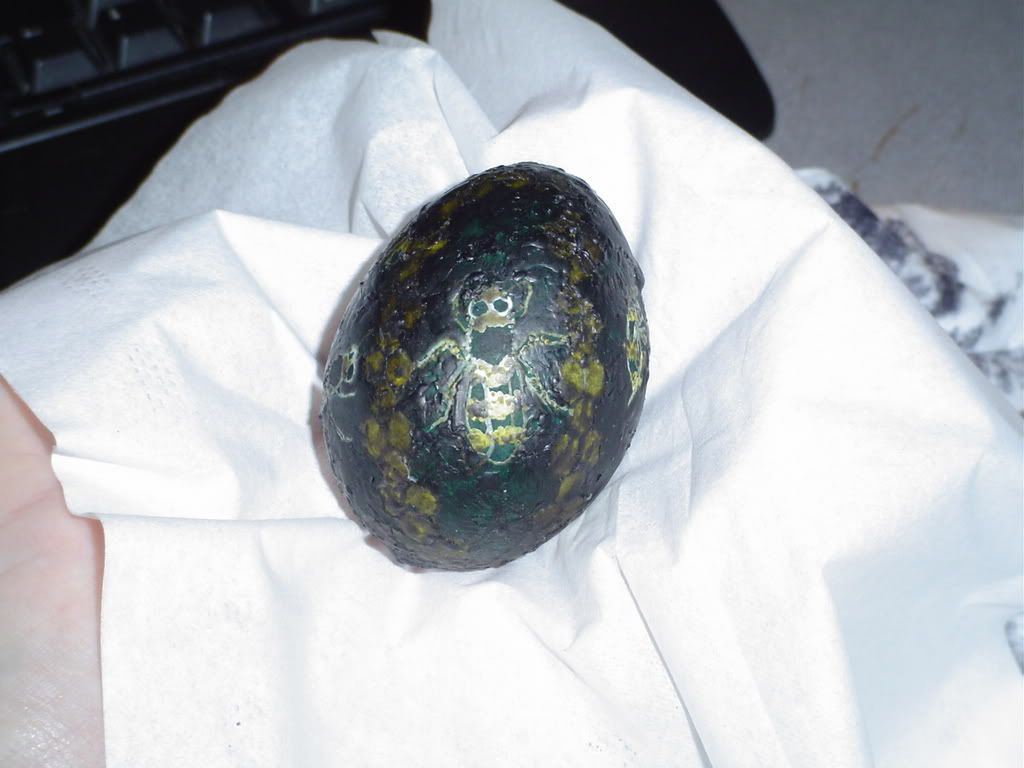
- Continue dipping the eggs in different colors until it is the darkest color you desire to use. Most eggs end in a deep red, brown, blue or black.
-
- Allow time for the egg to dry, patting it with a tissue.
- You can take off the wax by rubbing it off with a tissue after dipping the egg in boiling water (I never do this), or using lighter fluid on a tissue (I used to do this), or by simply heating the egg in the flame of the candle bit by bit and wiping off the melting wax with the tissue (this is what I do now), revealing the glorious colors underneath. You do have to be careful with the last method so you don't scorch the egg in the flame.
-
- When the egg is completely finished, I spray the egg with clear glaze. I use hot glue to attach a metal base and top so they can be hung. I usually attach a thin ribbon to the finding.
-
I hope you will enjoy the process of my egg-creating with me and I can't wait to see how it turns out! My sister may even donate a duck egg so I can create 2 for the auction (one duck egg, one chicken egg!).
")