


Meganc731
Well-Known Member
Hey everyone!!
I'm sure most of you don't even know me anymore because it's been so long since my last post. We've had our bunny Mr. Wiggles for 2 years now and from day one I have been struggling with pee spraying out the cage and the amount of poop he produces. Of course it only tripled when we decided it would be a great idea to get a second bunny!!! (2 bunnies equals 3 times the mess, lol JK!!)
After trying and trying and TRYING to fully litter train the buns we finally decided to redo our NIC cage so it would hold a slotted bottom. In the beginning it was great, but it was impossible to clean the slats and the bunnies had taken to spraying off of the top shelf, so we FINALLY did away with our NIC cage. It was such a sad goodbye, but someone actually picked it out of our trash by the next morning!!
We then moved on to an awesome one level, wire bottom, KW Cage. This has really been the best thing for us and for the buns. We go the Rabbit Space 4529 (42x30x26)Instead of using J clips to put the cage together, we used plastic ties so that we can easily take it apart when we decide to move (and we WILL be moving.... someday). We have two problems with the cage, the tray is so big that I can't change it by myself and if we miss even one litter change, we end up having to do a major overhaul. Because I'm currently pregnant (achy, inflexible, and nauseated), that puts most of the responsibility on my husband, Tim, and sometimes he just runs out of time to get everything done.
When I first purchased our KW Cage I saw the neat cleaning system they have on the first page of the catalog. I've been plotting ever since then trying to figure out how to make my own. Tonight, I think I have done it!!
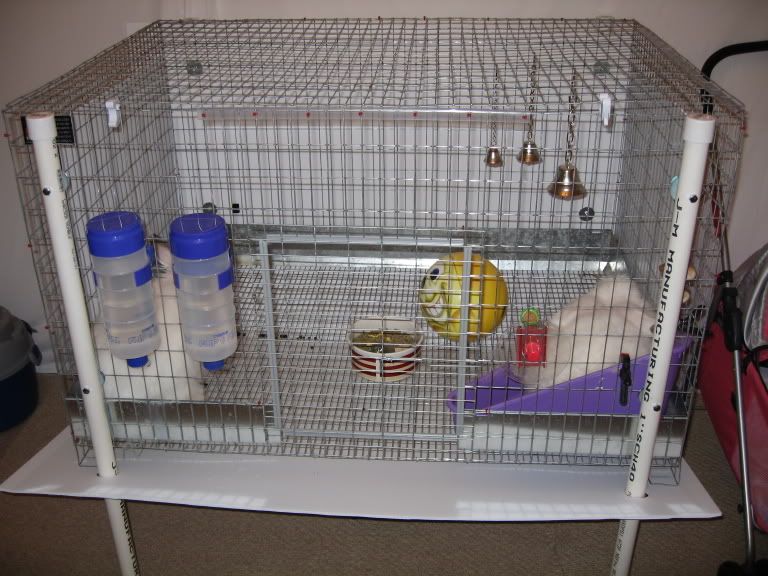
This first pic shows the front of the cage, there's 4 PVC legs all together, you can see the two in the front and you can see the very top of one of the legs in the back. There is 1 sheet of coroplast that goes down the back of the cage and then bends back up to the front of the cage (there's no seams, so stuff can't leak through)
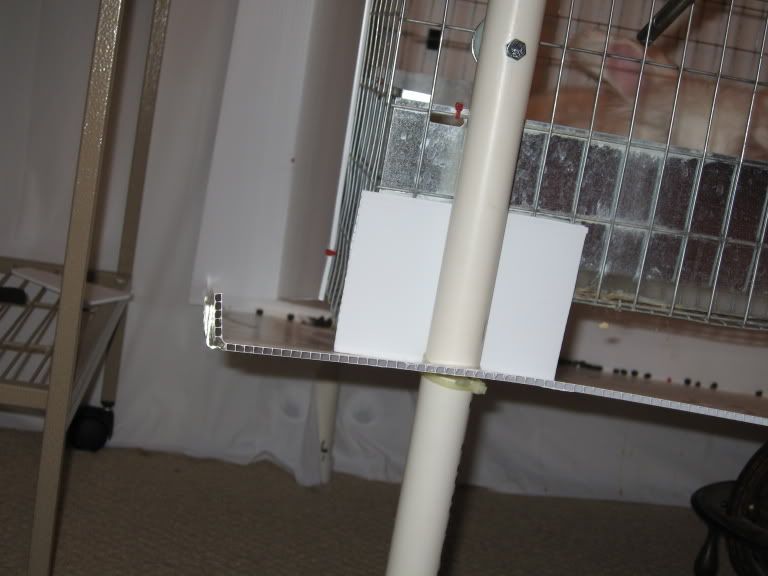
This pictures shows the side of the cage. There's about a 6 inch gap between the tray and the cage on the back against the wall, but it's angled up so that the tray touches the front bottom of the cage. (the only design flaw that we couldn't get around easily was putting the PVC leg through the tray in two spots, but those are usually the cleanest areas of the cage so it should be ok.
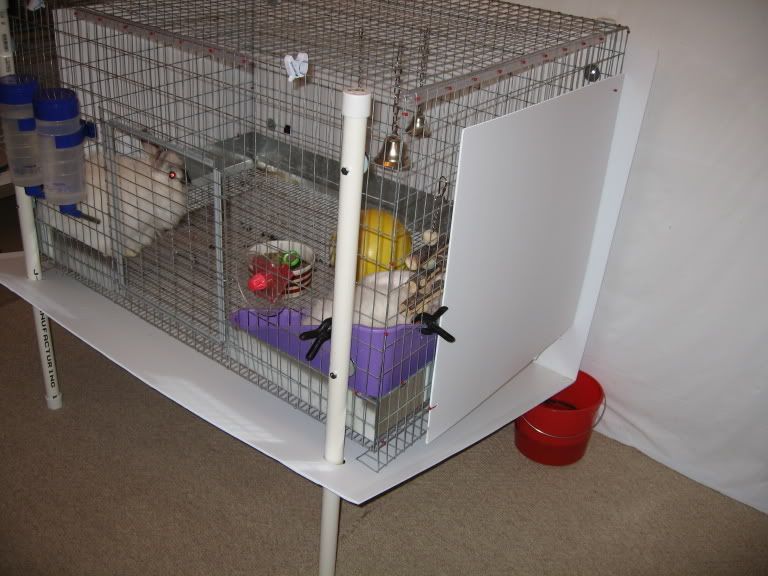
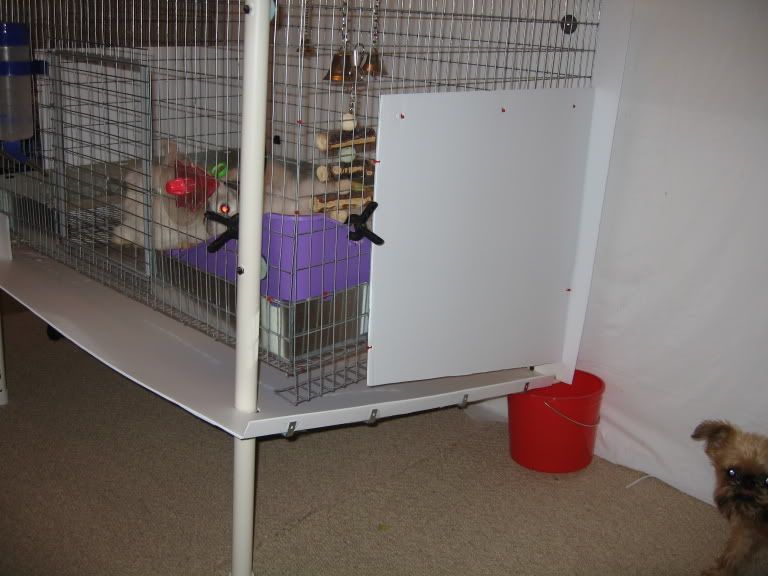
In this last picture, you can see how it all collects. The sheet of coroplast that creates the tray is mounted to the cage slightly crooked (if you look at the top you can see that the left side is even with the top of the cage, but the right side is dropped about an inch and a half). Now all we have to do to clean it is get a watering can and run water down the tray, everything flows to the back and then runs down to the right into the bucket. You can see in the picture that it's filled up with water a little bit after I tested it out. When it stops dripping you can go flush it down the toilet!!
We have one last thing to do, but we need to get some parts tomorrow. On the bottom part of the tray there is a seam (that you can't see) so that it can be turned at a right angle, that way it creates a little bit of a channle and water can't pour over the edges when rinsing.
I hope this has helped someone. If anyone has any questions or needs better pictures, ask away!!
Megan
I'm sure most of you don't even know me anymore because it's been so long since my last post. We've had our bunny Mr. Wiggles for 2 years now and from day one I have been struggling with pee spraying out the cage and the amount of poop he produces. Of course it only tripled when we decided it would be a great idea to get a second bunny!!! (2 bunnies equals 3 times the mess, lol JK!!)
After trying and trying and TRYING to fully litter train the buns we finally decided to redo our NIC cage so it would hold a slotted bottom. In the beginning it was great, but it was impossible to clean the slats and the bunnies had taken to spraying off of the top shelf, so we FINALLY did away with our NIC cage. It was such a sad goodbye, but someone actually picked it out of our trash by the next morning!!
We then moved on to an awesome one level, wire bottom, KW Cage. This has really been the best thing for us and for the buns. We go the Rabbit Space 4529 (42x30x26)Instead of using J clips to put the cage together, we used plastic ties so that we can easily take it apart when we decide to move (and we WILL be moving.... someday). We have two problems with the cage, the tray is so big that I can't change it by myself and if we miss even one litter change, we end up having to do a major overhaul. Because I'm currently pregnant (achy, inflexible, and nauseated), that puts most of the responsibility on my husband, Tim, and sometimes he just runs out of time to get everything done.
When I first purchased our KW Cage I saw the neat cleaning system they have on the first page of the catalog. I've been plotting ever since then trying to figure out how to make my own. Tonight, I think I have done it!!
This first pic shows the front of the cage, there's 4 PVC legs all together, you can see the two in the front and you can see the very top of one of the legs in the back. There is 1 sheet of coroplast that goes down the back of the cage and then bends back up to the front of the cage (there's no seams, so stuff can't leak through)
This pictures shows the side of the cage. There's about a 6 inch gap between the tray and the cage on the back against the wall, but it's angled up so that the tray touches the front bottom of the cage. (the only design flaw that we couldn't get around easily was putting the PVC leg through the tray in two spots, but those are usually the cleanest areas of the cage so it should be ok.
In this last picture, you can see how it all collects. The sheet of coroplast that creates the tray is mounted to the cage slightly crooked (if you look at the top you can see that the left side is even with the top of the cage, but the right side is dropped about an inch and a half). Now all we have to do to clean it is get a watering can and run water down the tray, everything flows to the back and then runs down to the right into the bucket. You can see in the picture that it's filled up with water a little bit after I tested it out. When it stops dripping you can go flush it down the toilet!!
We have one last thing to do, but we need to get some parts tomorrow. On the bottom part of the tray there is a seam (that you can't see) so that it can be turned at a right angle, that way it creates a little bit of a channle and water can't pour over the edges when rinsing.
I hope this has helped someone. If anyone has any questions or needs better pictures, ask away!!
Megan